How to download Instagram videos and Reels at scale with Apify

Picture this. Your marketing team just wrapped a three-month creator campaign. Thirty public Reels, a handful of IGTV videos, and dozens of short posts - all published, all public, and all living exclusively on Instagram. Now someone asks: "Can we archive these for the brand library?"
You open your browser, paste a URL into a random download site, and... nothing. Or worse, you get an ad-laden page with a broken download button. You try four more sites. Two work. One gives you a 240p file. And you've just spent twenty minutes manually processing what should take seconds.
Sound familiar? This is the reality for anyone managing Instagram video content at even a modest scale. The good news is there's a better way.
Instagram Video and Reel Downloader is an Apify Actor built specifically for this. It handles public Instagram Reels, /p/ video posts, and IGTV (/tv/) links in a repeatable, automation-ready workflow - giving you direct video URLs, metadata, thumbnails, and optional stored files, all in clean structured output.
This article walks you through exactly how it works, who it's for, and how to go from zero to a working download workflow in under ten minutes.
Instagram Video and Reel Downloader
Why downloading Instagram videos is harder than it looks
On the surface, saving an Instagram video sounds trivial. The content is public. The URL is right there. How hard can it be?
Harder than expected, it turns out.
Instagram doesn't expose direct video file URLs through any official public API. The platform serves video content dynamically from its content delivery network, and the URLs it generates are session-bound, expire quickly, and are deeply embedded in the page's internal data structures. What you see in your browser isn't what a simple HTTP request sees.
On top of that, Reels in particular behave differently from regular posts. Some pages expose enough data in the static HTML for a fast scraper to pick up the video URL immediately. Others don't - they require a realistic browser session to load the required JavaScript and resolve the actual media delivery request before the video URL becomes visible.
This is why so many free Instagram downloader websites are inconsistent. They work sometimes, fail silently other times, and give you no real explanation when something goes wrong. For a one-off personal download, that's annoying but acceptable. For a business workflow, it's a real problem.
Instagram Video and Reel Downloader was designed around this reality. It uses a two-path extraction approach: try the fast static route first, and fall back to a browser-based session for harder Reel pages that don't expose the video URL in their initial HTML. The result is a more dependable tool for real public content workflows.
What Instagram Video and Reel Downloader actually does
Let's be clear about what this Actor is and isn't.
It is not a browser extension, not a mobile app, and not a one-click website. It's an Apify Actor - a serverless cloud program that accepts structured input, performs a task, and returns structured output. You run it from Apify Console, call it through the API, or trigger it from an automation. It keeps a record of every run, and you can reuse the same configuration whenever you need it.
More specifically, for each public Instagram URL you give it, the Actor can return:
- a direct
videoUrlpointing to the resolved video file - a
thumbnailUrlfor the post's preview image - the post
titleanddescriptionwhen available - the canonical URL,
shortcode, andmediaType(reel,post, ortv) - optional file references if you choose to store the actual video or image in Apify's key-value store
- structured error data (with an
errorCodeanderrorMessage) if a URL can't be resolved - so the run stays auditable even when something goes wrong
That last point matters more than it might seem. Most free downloader tools just... fail. No error message, no record, no way to know what happened. This Actor keeps a dataset item for every URL it processes, whether it succeeded or not. For teams tracking a batch of URLs, that's a meaningful difference.
Ready to try it? Open Instagram Video and Reel Downloader in Apify Console and run it directly in your browser - no code required.
Who actually needs this?
Before getting into the walkthrough, it's worth being honest about who this tool is and isn't for.
If you occasionally want to save a single Instagram Reel for personal use, a free browser extension or a consumer downloader site will probably do the job. This Actor isn't aimed at that use case.
Where it earns its place is in repeatable, team-level, or integration-heavy workflows.
Social media managers and content teams often need downloadable copies of published Reels - for brand libraries, cross-platform repurposing, or simply keeping a backup of content that lives only on Instagram. Running a batch of URLs through this Actor takes minutes instead of an afternoon.
Agencies working with multiple clients or creator rosters regularly need to pull public video assets into approval workflows, reporting decks, or content management systems. A structured JSON output with direct video URLs and thumbnails is far easier to feed into those systems than manually downloading files and uploading them elsewhere.
Developers and automation builders can use the Actor as a building block. The Apify platform gives you API access, webhooks, and scheduling - so a workflow that starts with "download these public Instagram videos" can chain directly into "save to Google Drive," "send for review," or "push metadata to a spreadsheet."
Researchers and operations teams sometimes need video URLs and metadata for tracking or reporting purposes - not necessarily the files themselves. The dataset output covers that without requiring extra storage overhead.
Step-by-step: how to use the Actor from Apify Console
You don't need to write a single line of code to get your first result. Here's the full walkthrough.
Step 1: Open the Actor
Go to apify.com/eunit/instagram-video-and-reel-downloader.
If you don't already have an Apify account, you can create one for free. Once you're in, you'll land on the Actor's overview page. Read through the README - it's short and covers the key things to know before you run anything. Then click the Input tab.
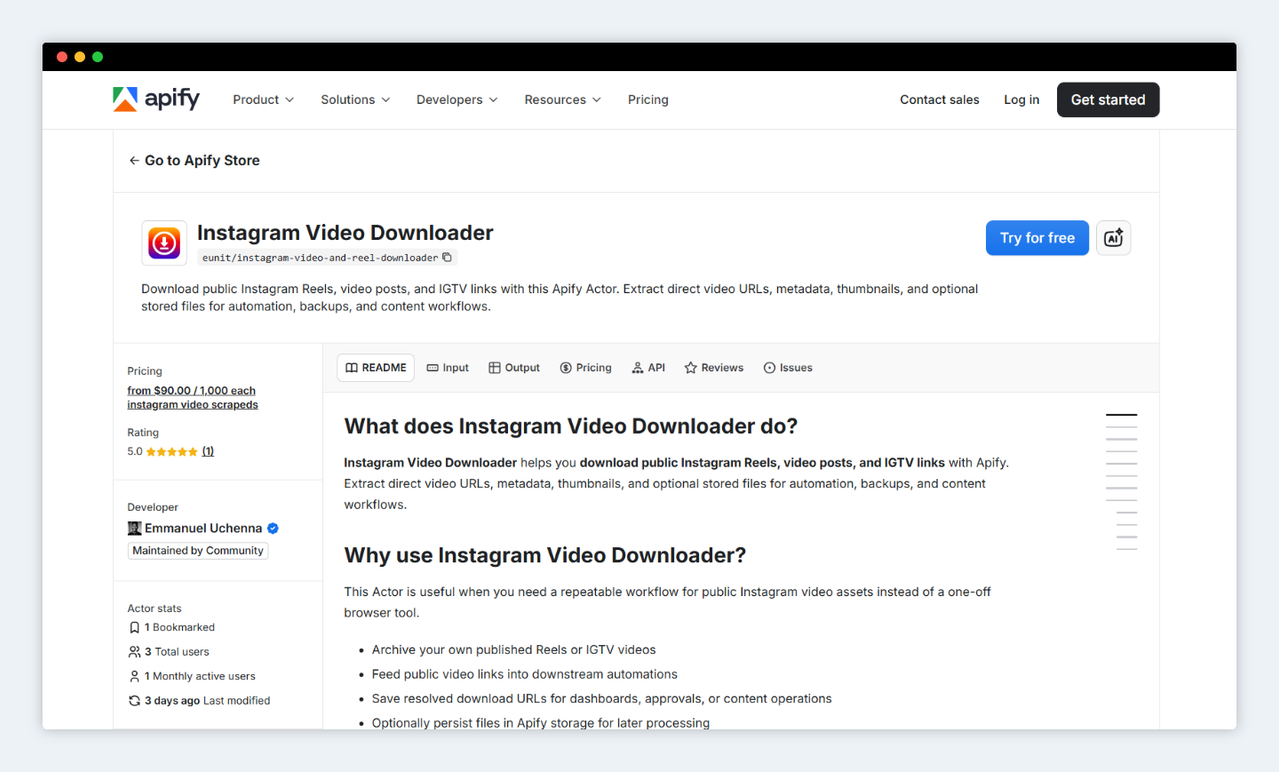
Instagram Video and Reel Downloader on Apify
Step 2: Collect your public Instagram URLs
The Actor supports three URL formats:
/reel/- standard Instagram Reels/p/- regular photo and video posts/tv/- IGTV-style long-form video
Copy the public URLs you want to process. The critical word there is public. This tool doesn't attempt to access private accounts, private posts, or restricted content. If the post isn't publicly viewable without logging in, the Actor will return an error item for that URL rather than silently pretending it worked.
A quick way to check: open the URL in a private/incognito browser window. If you can see the video without logging in, the Actor can process it.
Step 3: Configure the input
The Input tab in Apify Console gives you a form to fill in. Here's what each field does:
startUrls - This is the only required field. It's the list of Instagram URLs you want the Actor to process. You can add one or fifty.
storeVideoFiles - When this is enabled, the Actor doesn't just resolve the video URL - it also downloads the actual video file and stores it in Apify's key-value store, accessible via a public URL. Useful when you need the binary file, not just a link. Leave it off if the videoUrl in the dataset is sufficient for your workflow.
storeThumbnailFiles - Same idea, but for the post's thumbnail image. Enable it if you need the actual image file stored alongside the video reference.
includePageHtml - Saves the raw Instagram HTML from each fetched page to key-value store. You'll rarely need this, but it's a useful debugging tool if Instagram changes its page structure and the Actor stops resolving video URLs correctly.
filenamePrefix - If you're storing files, this prefix gets prepended to every stored filename. Something like campaign-june-2026 makes it easy to find related files later.
maxConcurrency - Controls how many pages the Actor processes in parallel. The default of 3 is a reasonable starting point. Keep this lower (1 or 2) if Instagram is rate-limiting your requests; only push it higher if speed is a priority and you're willing to accept some request failures.
maxRequestRetries - How many times the Actor retries a failed page request before marking it as an error. The default of 2 is fine for most use cases.
requestTimeoutSecs - The timeout for individual page fetches and optional file downloads. 30 seconds works well under normal conditions; increase it if you're on a slow connection or downloading large video files into storage.
proxyConfiguration - Optional proxy settings. Most users don't need this to start. If you run into consistent request failures or geo-blocking behavior, enabling Apify Proxy here can help distribute requests more effectively.
A realistic input configuration for a small batch might look like this:
{
  "startUrls": [
    { "url": "https://www.instagram.com/reel/ABC123xyz/" },
    { "url": "https://www.instagram.com/p/DEF456uvw/" },
    { "url": "https://www.instagram.com/reel/GHI789rst/" }
  ],
  "storeVideoFiles": true,
  "storeThumbnailFiles": false,
  "includePageHtml": false,
  "filenamePrefix": "campaign-june-2026",
  "maxConcurrency": 2,
  "maxRequestRetries": 2,
  "requestTimeoutSecs": 30,
  "proxyConfiguration": {
    "useApifyProxy": false
  }
}
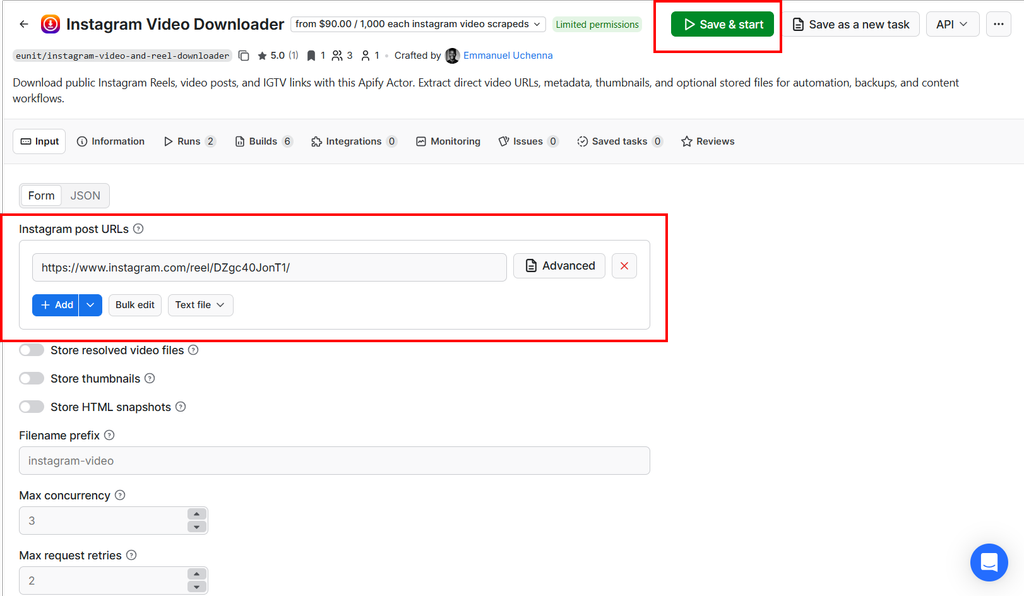
Sample Input on Apify Console
Step 4: Run the Actor
Click Run in the top-right corner.
The Actor starts processing your URLs immediately. For straightforward public posts and video pages, it extracts the video URL and metadata from the static page response - fast, efficient, no browser overhead. For trickier Reel pages that don't expose the video delivery URL in their initial HTML, it falls back to a browser-based path that can capture the actual media requests.
You don't need to manage any of this yourself. The Actor handles the routing internally.
You can watch the logs in real time as the Actor runs. Each URL gets processed, and any failures surface immediately with an error code and message rather than a silent skip.
Step 5: Review the dataset output
Once the run completes, click the Dataset tab.
Each URL you submitted produces one dataset item. A successful result looks like this:
{
  "status": "ready",
  "inputUrl": "https://www.instagram.com/reel/ABC123xyz/",
  "canonicalUrl": "https://www.instagram.com/reel/ABC123xyz/",
  "shortcode": "ABC123xyz",
  "mediaType": "reel",
  "title": "Instagram video",
  "description": "Caption text from the post",
  "videoUrl": "https://instagram.fcdn.example/v/t16/f1/video.mp4",
  "thumbnailUrl": "https://instagram.fcdn.example/v/t51/thumb.jpg",
  "videoStoreKey": "video-campaign-june-2026-abc123xyz.mp4",
  "videoPublicUrl": "https://api.apify.com/v2/key-value-stores/STORE_ID/records/video-campaign-june-2026-abc123xyz.mp4",
  "uploadDate": "2026-05-15T14:30:00.000Z",
  "fetchedAt": "2026-06-17T10:00:00.000Z",
  "errorCode": null,
  "errorMessage": null
}
A failed result is just as structured:
{
  "status": "error",
  "inputUrl": "https://www.instagram.com/reel/PRIVATE123/",
  "errorCode": "NO_VIDEO_URL",
  "errorMessage": "Could not resolve a public video URL from this page."
}
You can export the dataset in JSON, CSV, Excel, or HTML format - whichever fits your downstream workflow. If you enabled file storage, you can access all stored video and image files directly from the run's Storage tab.
Step 6: Put the output to work
This is where the Actor starts earning its value beyond a simple file download.
If your workflow is "download these URLs occasionally and review them manually," exporting the dataset as CSV and opening it in a spreadsheet is enough.
If your workflow is more continuous - weekly campaign archives, automated content pipelines, or team-level review processes - the Apify platform gives you several paths to build on this run:
- API calls: Trigger the Actor from any script using the Apify JavaScript or Python client, or a direct HTTP request. The output is the same structured dataset.
- Schedules: Run the Actor on a weekly or daily cadence with a fresh list of URLs.
- Webhooks: Fire a webhook when the run completes to trigger downstream steps in Make, Zapier, n8n, or your own backend.
- MCP server: If you're building AI workflows, the Actor is available as a tool through Apify's Model Context Protocol (MCP) server.
Integrating the Actor with code
If you're a developer or want to trigger the Actor programmatically, the setup is straightforward.
JavaScript / TypeScript:
import { ApifyClient } from 'apify-client';

const client = new ApifyClient({ token: 'YOUR_API_TOKEN' });

const input = {
  startUrls: [
    { url: 'https://www.instagram.com/reel/ABC123xyz/' }
  ],
  storeVideoFiles: true,
  filenamePrefix: 'my-archive'
};

const run = await client.actor('eunit/instagram-video-and-reel-downloader').call(input);
const { items } = await client.dataset(run.defaultDatasetId).listItems();

items.forEach((item) => {
  if (item.status === 'ready') {
    console.log('Video URL:', item.videoUrl);
  }
});
Python:
from apify_client import ApifyClient

client = ApifyClient("YOUR_API_TOKEN")

run_input = {
    "startUrls": [{"url": "https://www.instagram.com/reel/ABC123xyz/"}],
    "storeVideoFiles": True,
    "filenamePrefix": "my-archive"
}

run = client.actor("eunit/instagram-video-and-reel-downloader").call(run_input=run_input)

for item in client.dataset(run["defaultDatasetId"]).iterate_items():
    if item.get("status") == "ready":
        print("Video URL:", item["videoUrl"])
Install the client with npm install apify-client (JavaScript) or pip install apify-client (Python), then drop in your Apify API token from Apify Console under Settings > Integrations.
When it makes sense to pay for a reliable Actor
Let's address the obvious question: why pay for this when free downloader sites exist?
The honest answer is that free downloader sites are built for individual, one-off use. They're not designed to process batches, return structured data, integrate with APIs, or recover gracefully when Instagram changes something. They also come with ad loads, pop-ups, and opaque data practices that you probably don't want in a business workflow.
This Actor uses a pay-per-event model at $90.00 per 1,000 processed videos. That pricing structure means you pay for actual completed work - not a flat subscription that bills you whether you use it or not.
For context: if a marketing manager spends 30 minutes manually downloading and organizing 10 Instagram videos per week, that's roughly 26 hours of manual work per year. The same batch run through this Actor costs under $1 and completes in a few seconds.
The economics shift further when you factor in reliability. A workflow that fails halfway through a batch, returns corrupted files, or gives you no error visibility isn't really "free" - it's just deferring the cost into your time and frustration budget.
Paying customers here are buying dependability, structured output, and the ability to build workflows that run the same way every time.
A few things to keep in mind
This Actor is built for public Instagram content, and it's worth being clear about what that means in practice.
Private content won't work. If a post requires you to be logged in to view it, the Actor can't access it, and it will return an error item for that URL.
Instagram can and does change things. The page structure, video delivery logic, and anti-bot behavior can shift with Instagram updates. When that happens, the extraction may stop working for some URL types until the Actor is updated. The structured error output means you'll know which URLs failed rather than getting a silent empty result.
You're responsible for compliance. Only download content you own, have explicit permission to use, or have a legitimate business reason to process. Respect copyright, platform terms, and local laws. The tool does what it's designed to do - how you use it is your responsibility.
Wrapping Up
Most Instagram video download tools are consumer utilities. They're built for "save this one Reel right now" - not for "process this batch of public videos, give me structured output, and let me automate it next week too."
If your work touches Instagram video content at any real scale - campaign archives, content pipelines, creator workflows, or automated reporting - that distinction matters a lot.
Instagram Video and Reel Downloader is built for the second use case. It gives you direct video URLs, structured metadata, optional file storage, a reliable fallback for difficult Reel pages, and a platform underneath it that supports APIs, scheduling, webhooks, and integrations.
Try it from Apify Console with a few public URLs. The first run takes about few seconds to set up, and you'll see immediately whether it fits the workflow you're building.
Get started with Instagram Video and Reel Downloader on Apify →

Emmanuel Uchenna
@eunit99Hi, I’m Emmanuel Uchenna — a frontend engineer, technical writer, and digital health advocate passionate about building technology that empowers people. With over five years of experience, I specialize in crafting clean, scalable user interfaces with React, Next.js, and modern web tooling, while also translating complex technical ideas into clear, engaging content through articles, documentation, and whitepapers.